

As the days and months march on its hard to remember that just a short time ago you were that little new born bundle - Im so grateful to be able to look back over these letters to you - to reminicse over all the little things you no longer do, to be amazed by all the things that you have achieved, and to look forward to all that your life has in store for you in the future.
 I thought by the time this letter was written I would finally be able to announce the fact you were walking, but no...you have taken those first tentative and unbalanced steps,
  you are standing more often than not as you go about your day, but the actual walking is still not happening. In the last few days Ive watched you get up and take a few steps all by yourself. Its the first time Ive seen you do this with out prompting from one of us. You are beginning to realise that you can walk, and Im sure it wont be long until you are officially toddling around the place.
You love being outside,
 but because you are not walking its a bit hard to get out there much at the moment.
 We try and get to the playground when we can.
  You love to watch Isaac, and swing and climb onto everything.
You have discovered you can climb onto Isaacs rocking horse and have quickly become very proficient at rocking yourself on it. You think you are very clever.
You think you are very clever.Your room is nearly complete - its been so long in coming. We are doing the final bits & pieces. The holes from the old curtain rails etc were filled, and the other weekend Daddy & Isaac put a coat of paint on the walls to freshen them up. Ive finished all the art work for the walls. I love that you notice when ever a new piece gets put up, and that you are excited and point out the birdies and the butterflys around your room. All that needs to be finished is your quilt. The top needs quilting and binding. Ive dropped it at the shop, to be machine quilted with a pretty little flower and heart pattern - it should be back in about 4 weeks.
Ive finished all the art work for the walls. I love that you notice when ever a new piece gets put up, and that you are excited and point out the birdies and the butterflys around your room. All that needs to be finished is your quilt. The top needs quilting and binding. Ive dropped it at the shop, to be machine quilted with a pretty little flower and heart pattern - it should be back in about 4 weeks.It is so cute watching you try and imitate what everyone else does. You try and brush your hair, you copy how Isaac washes himself in the bath, you try and put things away in the toy boxes while Im packing up, change the channel with the remote control, and attempt to help fold the washing (which is very NOT helpful). The other day Nath was playing on the xbox when you spotted the other controller. You grabbed it, sat yourself up, and while looking at the screen started trying to push the buttons. You dont miss a thing!
 It hasnt taken you long to work out an effective way of expressing your self if you are being annoyed by your brothers. You pull this face and let out a mighty yell. You dont scream or squeel, its a cross, dont mess with me sort of yell. Very un-lady like!
 Last week I attempted to make my first ever dress for you. It looks so gorgeous on you, I cant wait till summer arrives and you can wear it.
 Your last eye tooth finally cut this month. Hopefully thats it...until the two year old molars start to make their presence felt!
 Its been a busy month. Two weeks of school holidays, we have celebrated Mandy, Monice, Isaac & Daddys birthdays and also welcomed your new little cousin, Bailey Jack, to the world. Lots of family time. You got lots of cuddles form Nanna & Pappa who returned from an eight week trip away...they couldnt believe how much you had grown up, or that you're still not walking yet!!!
You have started getting really cuddly and Im loving it- who could ask for anything more from you than all those precious sloppy kisses and cuddles.
I love you baby girl, so, so much!!!!
Mummy xxxx

 It was Craigs birthday a week ago and while he was at work the kids and I wrapped presents and made a cake and even blew up a few balloons. I thought we were all finished when Isaac piped up - "we gotta have birthday flags" . He loved helping me make all the birthday bunting for Jacintas 1st birthday party, and now thinks that along with a cake, a party needs flags LOL
 They did a great job, and it was nice to see them all co-operating and working together...for a change!

 I wanted something cheap to practice with. I woke up this morning and decided I wanted to make a dress. Ive never attempted to sew a dress before - my biggest achievement to date was PJ pants! Im really not a good pattern follower, so I got one of my favourite little dresses that looked relatively simple and drafted a pattern for the bodice, studied how I thought it was put together and winged it from there.
  Eventually I got there - and I only had to unpick one little section.
  Now if little Miss ever decides to walk she can check out its twirling potential - surely by the time the weather warms up she will be well and truely walking!
  I think she likes it!


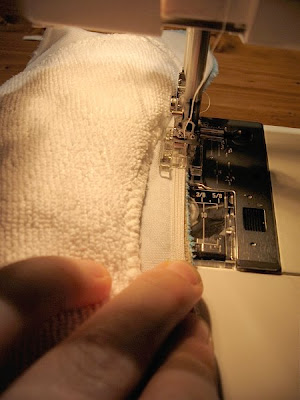
 Step 4 - I have left the old elastic in the nappy and stitched the new over the top. You could unpick and remove the old elastic if you wanted. This is what the stretched leg elastic in the nappy looks like before putting the new piece in.
 The nappy should now look like this.


 How hard could it be to whip one up out of some fabric I thought? A while back I got some end of bolts of fabric from spotlight. Great patterns for the older boys, I plan to make some summer PJ pants from it and maybe even new quilt covers (I got about 15 m of each one!) and it worked out to only about 50c/m. what did I have to loose? (Except my sanity maybe!!!!) All I had to do was unpick a bag ( I had one that was starting to come undone at the seam anyway), draft a pattern from it, cut out the fabric and sew it up! An hour or so I thought - no worries! More like two and a half !!!!
 I guess it wasnt really that hard. Ive never really used bias binding before and I hate pinning things before I sew. Note to self - when trying to use said binding always pin it first to avoid unpicking and having to fix!!!!
  I sewed, unpicked and re sewed two of the four sections before I finally admited defeat and pinned it first..LOL it was then still a little tricky, but so much quicker and easier! Its a little rough around the edges, and apart from having a bit of trouble getting the biding to sit nicely around the flap section, Im really happy with the way it turned out.
 Should be a handy bag for one of the boys...if Isaac will let anyone else near it!!!